Kali#
System Configuration#
Change Source#
sudo vim /etc/apt/sources.list
USTC Source
deb http://mirrors.ustc.edu.cn/kali kali-rolling main non-free contrib
deb-src http://mirrors.ustc.edu.cn/kali kali-rolling main non-free contrib
Tsinghua Source
deb http://mirrors.tuna.tsinghua.edu.cn/kali kali-rolling main contrib non-free
deb-src https://mirrors.tuna.tsinghua.edu.cn/kali kali-rolling main contrib non-free
Aliyun Source
deb http://mirrors.aliyun.com/kali kali-rolling main non-free contrib
deb-src http://mirrors.aliyun.com/kali kali-rolling main non-free contrib
Official Source
deb http://http.kali.org/kali kali-rolling main no-free contrib
deb-src http://http.kali.org/kali kali-rolling main non-free contrib
After completing, press esc and then type to save and exit.
Then update
sudo apt update
sudo apt upgrade -y
sudo apt dist-upgrade -y
sudo reboot now
Root Login#
- First, change the default root password.
sudo passwd root
- Install the package using the command
apt-get install kali-root-login.
After installation, enter the command passwd to change the root password.
Use root login after rebooting with init 6.
Install Network Card Driver#
sudo apt install realtek-rtl88xxau-dkms -y
sudo apt install dkms -y
git clone https://github.com/aircrack-ng/rtl8812au
cd rtl8812au/
make
sudo make install
Check it
lsusb
iwconfig
After completion, test it
sudo wifite
Graphics Card Driver#
Some computers using NVIDIA graphics cards may encounter driver incompatibility issues after installing Kali. To resolve this issue, refer to the following steps:
apt-cache search linux-image
apt-get install linux-image-xxx linux-header-xxx
init 6
echo -e "blacklist nouveau\noptions nouveau modeset=0\nalias nouveau off" > /etc/modprobe.d/blacklist-nouveau.conf
update-initramfs -u && reboot
apt-get install dkms
After downloading the corresponding NVIDIA driver, execute the installation with the following command.
./NVIDIA-Linux-x86_64-470.74.run # Select yes for all prompts
After installing the driver, some configuration files need to be edited.
vi /etc/X11/xorg.conf
Section "ServerLayout"
 Identifier "layout"
 Screen 0 "nvidia"
 Inactive "intel"
EndSection

Section "Device"
 Identifier "nvidia"
 Driver "nvidia"
 BusID "PCI:1:0:0"
EndSection

Section "Screen"
 Identifier "nvidia"
 Device "nvidia"
 Option "AllowEmptyInitialConfiguration"
EndSection

Section "Device"
 Identifier "intel"
 Driver "modesetting"
EndSection

Section "Screen"
 Identifier "intel"
 Device "intel"
EndSection
vi /usr/share/gdm/greeter/autostart/optimus.desktop
[Desktop Entry]
Type=Application
Name=Optimus
Exec=sh -c "xrandr --setprovideroutputsource modesetting NVIDIA-0; xrandr --auto"
NoDisplay=true
X-GNOME-Autostart-Phase=DisplayServer
vi /etc/xdg/autostart/optimus.desktop
[Desktop Entry]
Type=Application
Name=Optimus
Exec=sh -c "xrandr --setprovideroutputsource modesetting NVIDIA-0; xrandr --auto"
NoDisplay=true
X-GNOME-Autostart-Phase=DisplayServer
init 6
In the above commands, executing the apt-cache search linux-image command can retrieve the latest kernel version of the Kali system. The system kernel is the most basic part of the operating system. In the Linux environment, some software and drivers need to call the latest kernel version during installation. Therefore, we need to find and install the latest version of the system kernel.
Execute the apt-get install linux-image-xxx linux-header-xxx command to install the latest kernel version of Kali, where xxx represents the kernel version. As shown below:

After installing the new kernel, you need to reboot the computer, and the remaining commands can be executed in order as mentioned above.
SSH#
You can use the systemctl command to check and set the status of the OpenSSH service.
systemctl status sshd.service    # Check SSH status
systemctl enable sshd.service    # Enable SSH auto-start
systemctl start sshd.service     # Start SSH service
systemctl stop sshd.service      # Stop SSH service
Configure passwordless (public/private key authentication) login.
The ssh-keygen command generates a public/private key pair.
Entering the root directory, you can see the following key files:
  id_rsa        # Private key
  id_rsa.pub    # Public key
Edit vi /etc/ssh/sshd_config, modifying the entries related to PubkeyAuthentication and AuthorizedKeysFile to the following content:
PubkeyAuthentication yes
AuthorizedKeysFile      .ssh/authorized_keys
Restart the service.
Machine A (client) uses the ssh-copy-id [user]@[host] command to copy the key file to Machine B (server).
Then the client accesses the server, and we will find that it logs in directly without a password.
Tmux#
nano ~/.tmux.conf
#tmux attach if no detached terminal, create a new one
new-session
# split panes using | and -
bind | split-window -h
bind - split-window -v
unbind ' " '
unbind %
# switch panes using Alt-arrow without prefix
bind -n M-Left select-pane -L
bind -n M-Right select-pane -R
bind -n M-Up select-pane -U
bind -n M-Down select-pane -D
# reload config file (change file location to your the tmux.conf you want to use)
bind r source-file ~/.tmux.conf; display-message "Config reloaded.."
set -g mouse on
bind V source-file ~/.tmux/layout1         #ctrl b + shift v => change
mkdir ~/.tmux
nano ~/.tmux/layout1
selectp -t 0 # select the first (0) pane
splitw -v -p 50 # split it into two halves


selectp -t 1 # select the new, second (1) pane
splitw -h -p 50 # split it into two halves
selectp -t 0 # go back to the first pane
Common Software#
Sublime Text#
Install Sublime Text online using the apt tool, including x86_64 and ARM 64 versions.
Install GPG key:
wget -qO - https://download.sublimetext.com/sublimehq-pub.gpg | sudo apt-key add -
Ensure apt can use https:
sudo apt-get install apt-transport-https
Choose an available version:
Stable version
echo "deb https://download.sublimetext.com/ apt/stable/" | sudo tee /etc/apt/sources.list.d/sublime-text.list
Development version:
echo "deb https://download.sublimetext.com/ apt/dev/" | sudo tee /etc/apt/sources.list.d/sublime-text.list
Update the apt software list and install Sublime Text:
sudo apt-get update
sudo apt-get install sublime-text
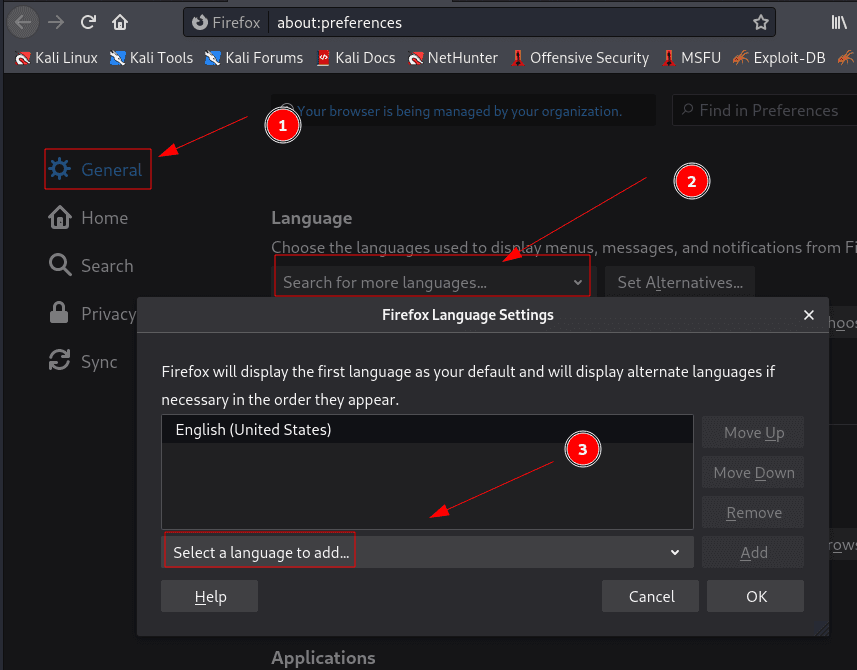
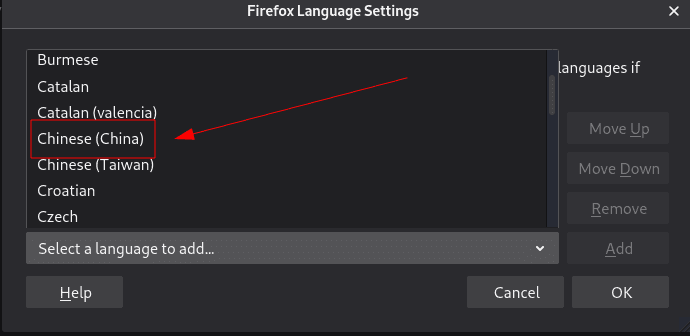
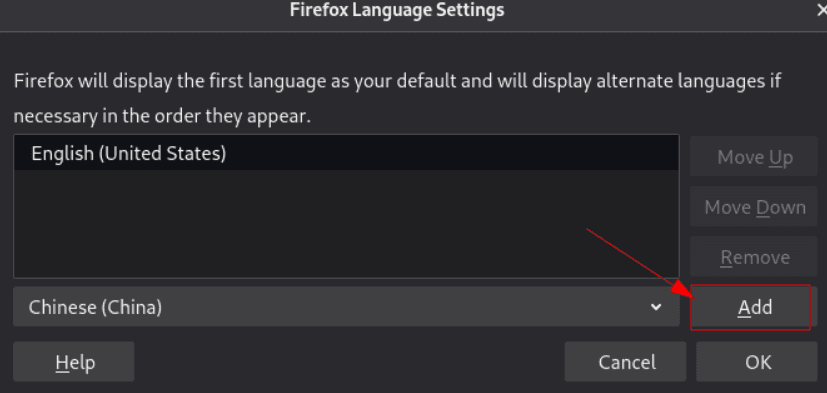
Chinese Input Method#
sudo apt install fcitx
sudo apt-get install fcitx-googlepinyin
reboot
Click the input method icon in the upper right corner of the desktop, click Configure.
Uncheck Only Show Current Language, select Google Pinyin, OK.
ctrl+space to switch.
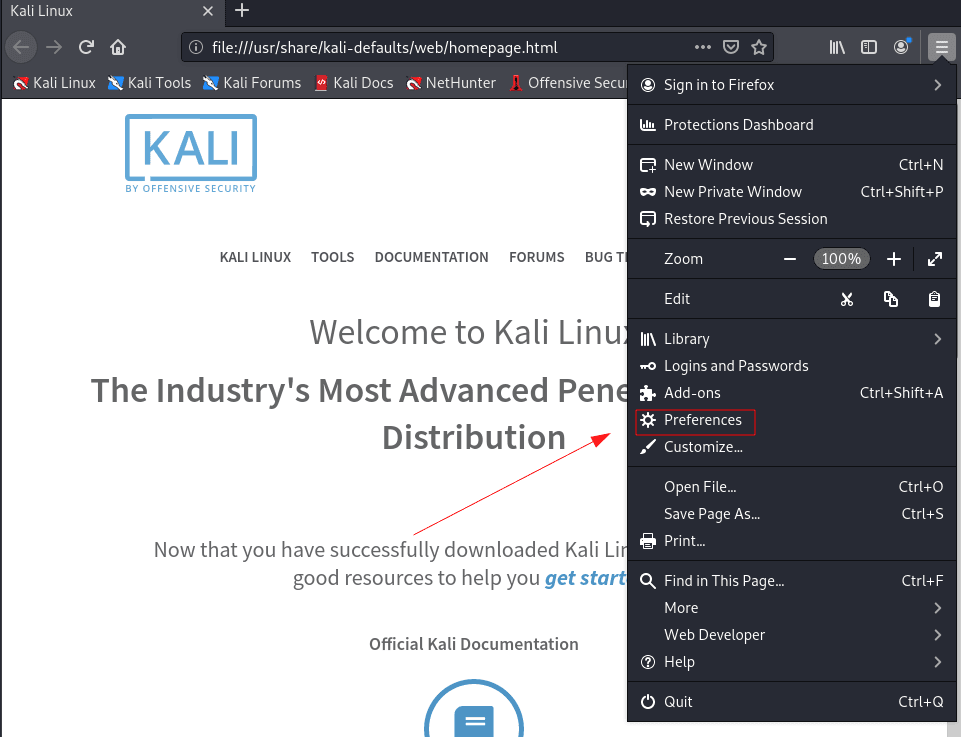
Firefox Browser Optimization#
Mozilla Firefox, commonly known as "Firefox" in Chinese, is a free and open-source web browser developed by Mozilla. It comes pre-installed with the Kali system, and we need to adjust some functions before use.
Disable success.txt in Firefox and Enable Plugin Installation#
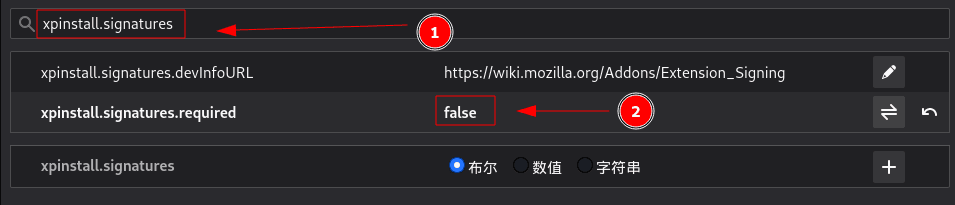
Open the browser, enter about:config in the address bar.
In the search bar, enter network.security.ports.banned.override, create a new string, and set the value to 0-65535.
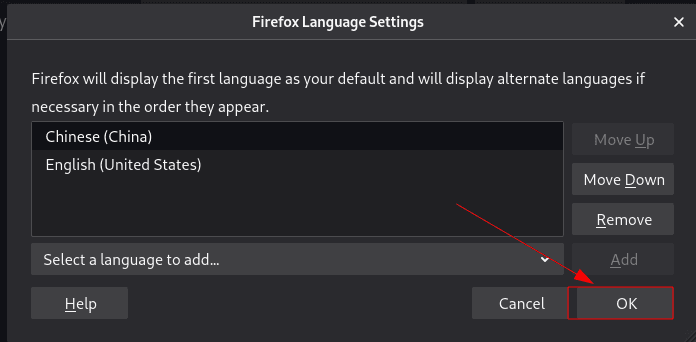
In the search bar, enter xpinstall.signatures, double-click the line for xpinstall.signatures.required to change it to false.
Update Firefox Browser#
Execute the command apt-get install firefox-esr in the terminal to upgrade the Firefox browser to the latest version.
Install Chrome Browser#
Having two browsers better meets the needs of information security work, so we will install Google Chrome as well.
apt-get install chromium
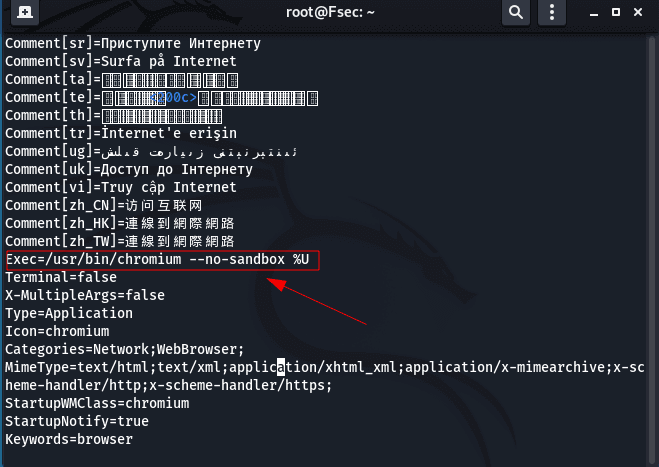
vim /usr/share/applications/chromium.desktop
Exec=/usr/bin/chromium --no-sandbox %U
After executing the vi /usr/share/applications/chromium.desktop command, change the Exec line in the text to the following content:
Typora needs to execute the following commands:
wget -qO - https://typora.io/linux/public-key.asc | sudo apt-key add -
add-apt-repository 'deb https://typora.io/linux ./'
apt-get update
apt-get install typora
vim /usr/share/applications/typora.desktop
Change exec to: /usr/bin/typora --no-sandbox
Flameshot Screenshot Tool Installation#
The screenshot function is essential for writing study notes and penetration testing reports. In Kali, we can install a screenshot tool called Flameshot.
Installation:
sudo apt-get install flameshot
Set shortcut keys:
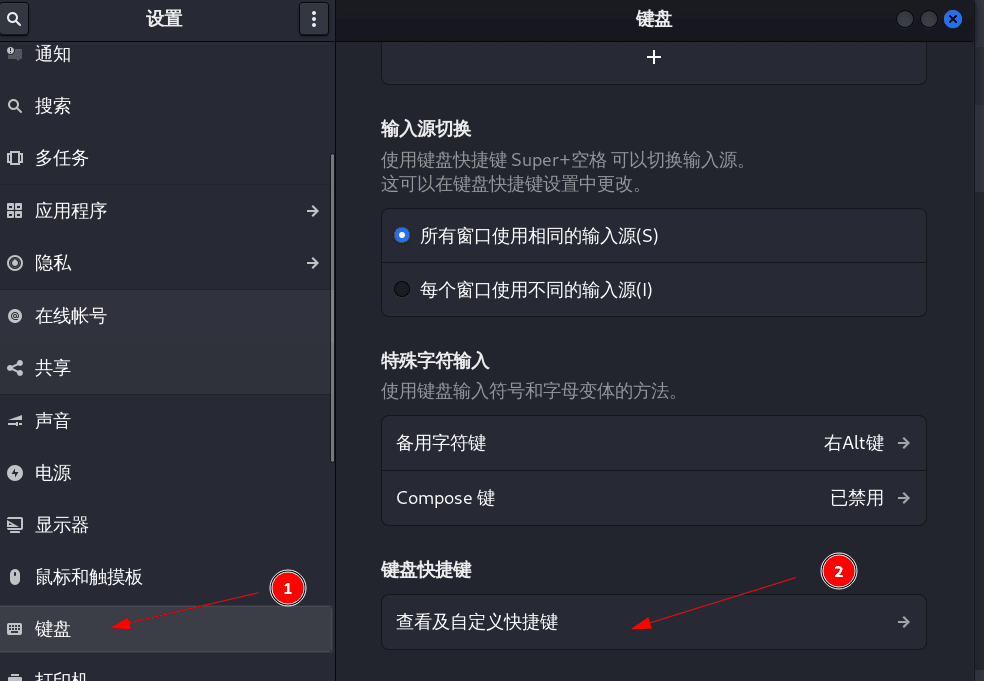
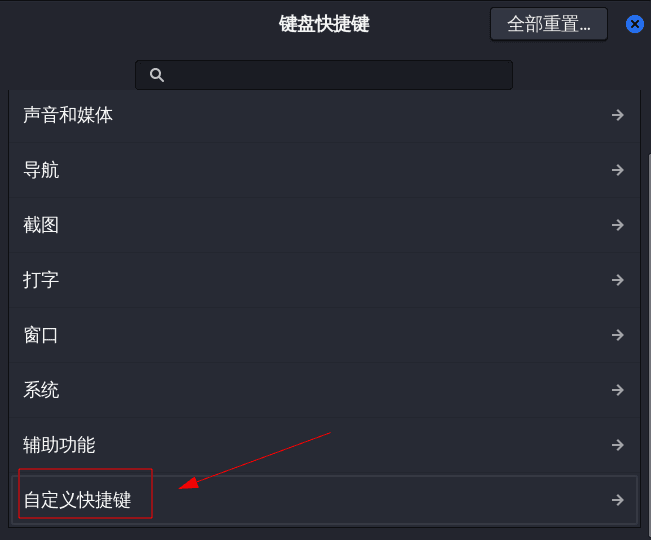
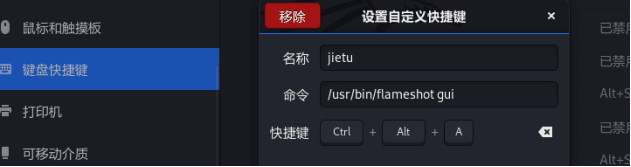
After setting up, press Ctrl+Alt+A to take a screenshot.
Common Tools#
Information Gathering Tools#
Rustscan#
Rustscan is a fast port scanning tool.
Download the deb package 👉 https://github.com/RustScan/RustScan/releases
wget https://github.com/RustScan/RustScan/releases/download/2.0.1/rustscan_2.0.1_amd64.deb
Open the terminal in the download folder and enter dpkg -i
wget https://github.com/RustScan/RustScan/releases/download/2.0.1/rustscan_2.0.1_amd64.deb
chmod +x rustscan_2.0.1_amd64.deb
sudo dpkg -i rustscan_2.0.1_amd64.deb
Installation complete.
Usage
rustscan -b 30 -a target -q
Feroxbuster#
sudo apt install feroxbuster -y
Gobuster#
sudo apt install gobuster -y
Steghide#
sudo apt install steghide -y
Xray#
Github Repo not found
The embedded github repo could not be found…
Privilege Escalation Tools#
Pspy#
Download on the target host.
- 32 bit big, static version:
pspy32download - 64 bit big, static version:
pspy64download - 32 bit small version:
pspy32sdownload - 64 bit small version:
pspy64sdownload
chmod 777 pspy64
./pspy64
Linpeas#
https://github.com/carlospolop/PEASS-ng/releases/latest
Fscan#
Github Repo not found
The embedded github repo could not be found…